
How to make your own LED bulbs

Reducing the energy you consume in your home and, thereby, saving on your electricity bill and emissions has a lot to do with the use of LED bulbs. If you are aware of these aspects and, in addition, you like to create with your own hands all (or at least part) of what you need for your home, we tell you how to make your own LED bulbs. Although it will take some time and can put your patience to the test, this project will provide hours and hours of sustainable lighting for the home.
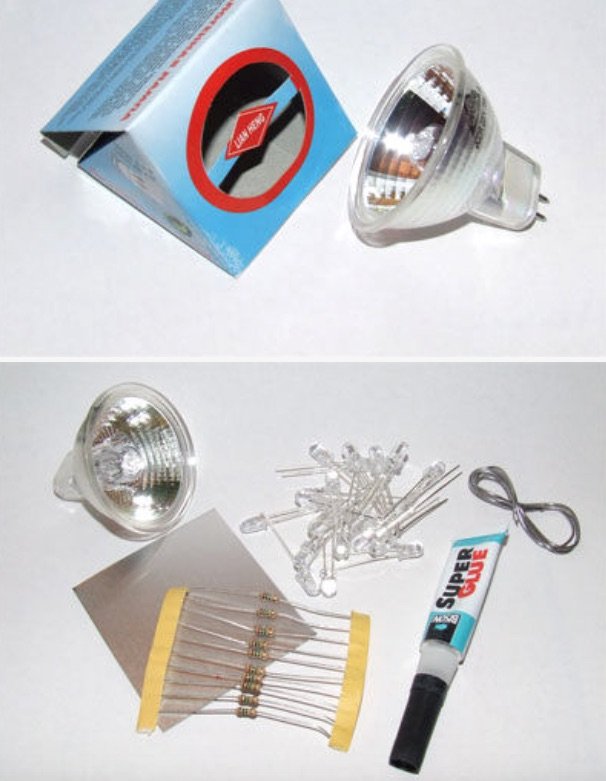
Materials and tools needed
- A halogen bulb without a glass cover on the front. You can use a reused one or buy it again.
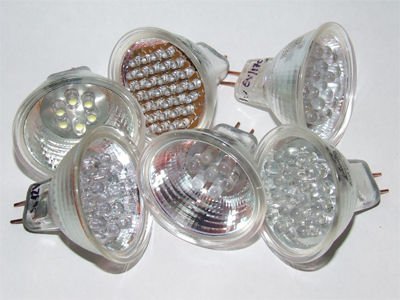
- LED spotlights, as many as you consider, but beware, if you go beyond 22 the work can be hard.
- Superglue or other composite glue.
- Welder and cable for welding.
- A small piece of 0.2 mm aluminum foil.
- A paper punch.
- Internet access to consult http://led.linear1.org/led.wiz to calculate the range of light. This will allow you to estimate the resistances that you will need.
Manufacturing step by step.
First step: Empty the bulb.
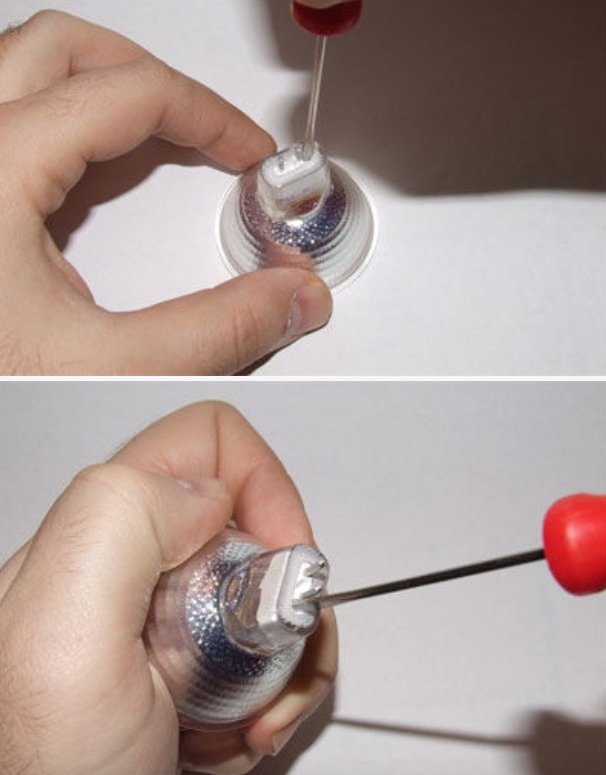
The first thing you will have to do is remove the cement finish from the base of the bulb. For this, the ideal will be to use a small screwdriver. As soon as you start with this task you will see how this finish comes off in the form of fine dust. Carry out this operation with care, so as not to damage the bulb.
Second step: Detach the bulb's focus.
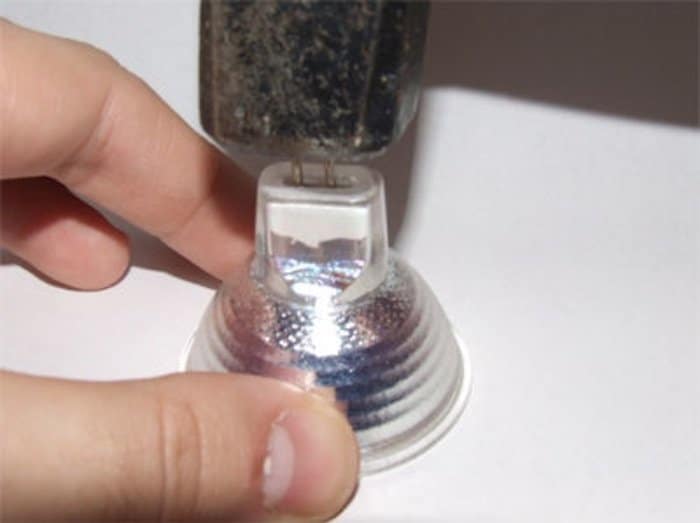
Once you have extracted all the finishing you can, hit with a hammer the pins of the bulb. Do it carefully, but firmly. The bulb inside should come off and fall on the table you're working on. With this, the reflector will remain empty.
Third step: Prepare the support.
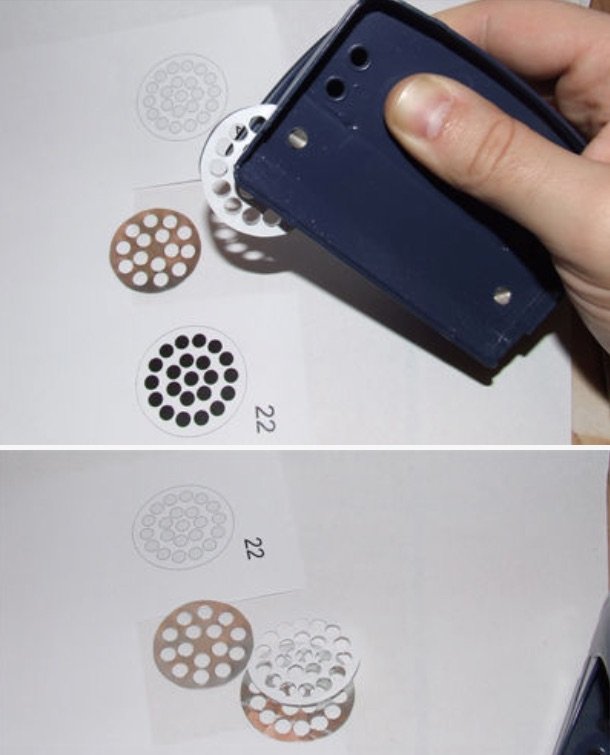
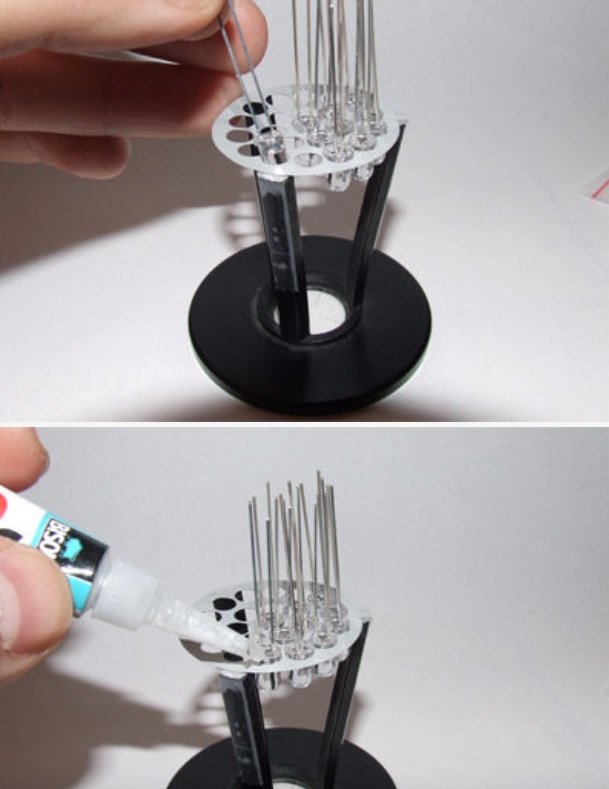
To make your support for the bulb you will need a template. Keep in mind that the size of the disk will be what you decide and that the more bulbs, the bigger the disk should be.
The first thing you have to do is print the template and cut the one you are going to use. Place it on the aluminum foil and glue it with glue.
Then take the sheet and make the holes with a hole punch. To do this, keep the piece face down and enter both the aluminum and the template that you have pasted. Although this operation can take your time, it should not be complicated.
Fourth step: Discover how to connect LEDs.
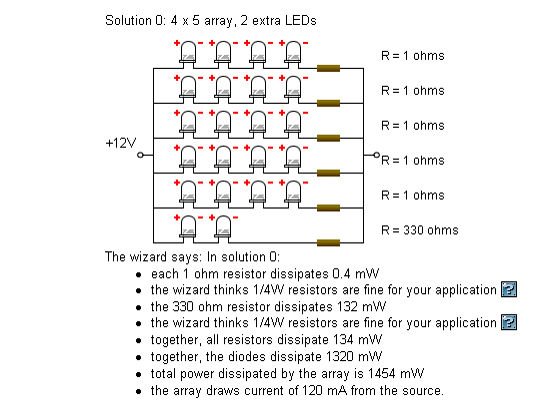
In this step you will have to pay attention to the way in which you will have to connect the LEDs. For this, consult http://led.linear1.org/led.wiz . Once you enter your parameters, you will get the most suitable solution. In the picture you can see the one that was contributed for this 22 LED and 12 volt project.
Step five: Mount the LED board.
Place the aluminum disc on some surface where it can be held firmly. Once you get it, insert the LEDs in the holes with the legs facing out, so that a cathode is located next to an anode. If you do not follow this step, at the time of welding you will have many more difficulties.
Fix each LED with glue, being very careful not to apply it on the legs since, if you do, the welding will also be complicated.
Sixth step: Connect the LEDs.
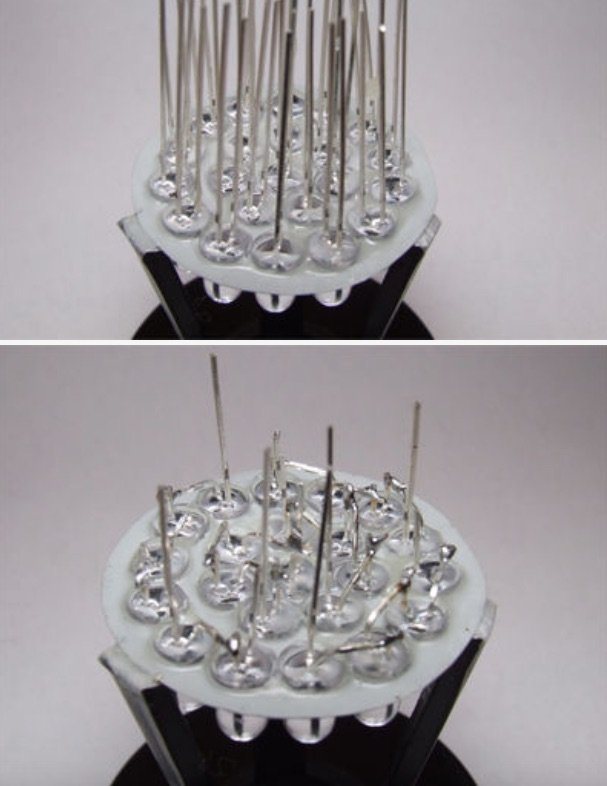
Once you have finished with all the LEDs, apply glue around each of them to reinforce the fixation.Wait until it dries well before continuing.
Then, with a plier or a similar tool, cut the legs of the LEDs. To do this, keep in mind that, immediately after, you will have to bend an anode over the next cathode and so on until everything is connected. To avoid confusion, you can use a multimeter.
At this point five rows will be made with four LEDs in each of them. In addition, another one will be added only with two. The number of rows and LEDs will change according to the indications you obtained in the fourth step.
If you inserted the LEDs so that the cathode was next to the next anode, you will be happy about it in this phase of the project, in which you have to solder row by row. When you finish one of them, keep the final legs to different measures to more easily identify the positive and the negative.
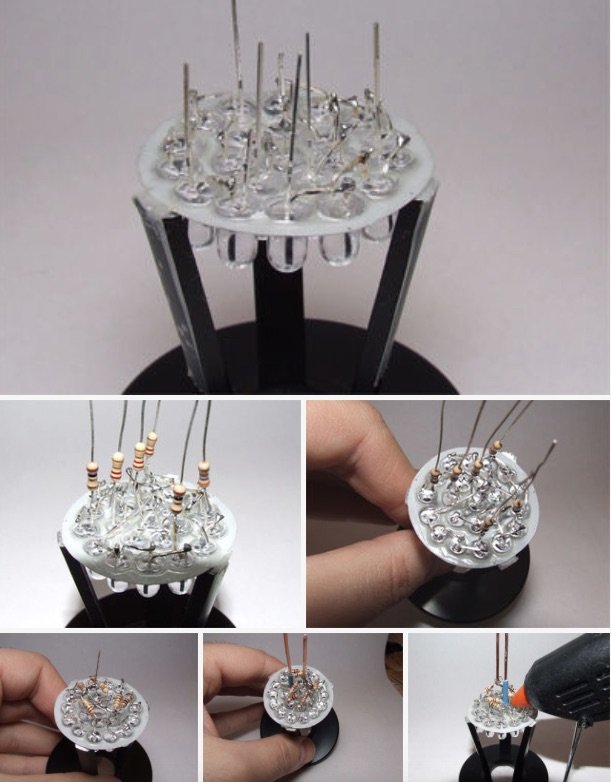
Seventh step: Solder the structure.
Bend the longer legs as you see in the image and sweep them so that all the positives are connected.Next you will have to weld the resistors in vertical with the negatives. Try to perform this operation as quickly as possible since any excess heat can damage the LEDs.
There will still be more welding work, since then you will have to weld the resistances together so that there is only one negative for all the rows of the plate. Finally, weld the final legs with copper wire.
If you want to reinforce the structure, you can do it with a gluing gun, although welding should be sufficient.
Eighth step: Join the helmet and the disc.
Now retrieve the hull of the bulb and place the disk inside. Push until the disc touches the interior reflector. Once you do, apply glue. Make sure the disc is perfectly fixed so that the pieces do not come off. Once the glue dries, note the positive and negative, as well as the voltage, with a marker.
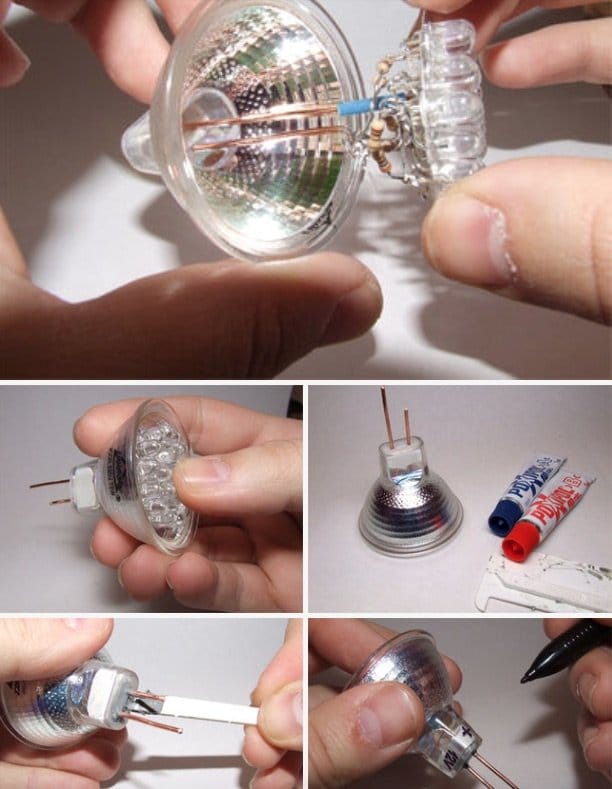
Ninth step: Check that everything works.
Now you only have to cut the legs so that the size is the same as that of the original LEDs and you will have finished. Before singing victory, make sure the bulb works and, now, the project will be ready. If the idea has attracted you, do not forget that you can put it into practice with bulbs of all colors and types, although you will have to take into account the voltage and current to calculate the resistances.


No comments:
Post a Comment
Thanks, Have A Nice Day